Putting walls up in our van was actually a fairly easy task in the end (omitting all of the trim, carpenter’s putty, and spackle towards the tail). However, we went through a few different ideas for how we would accomplish the task. Initially, we wanted walls with zero seams to be seen which would require flexible wall materials but after reviewing the options we went with tongue and groove.
Materials needed:
- 1×6″ primed treated pine tongue and groove board
- 1 1/4″ self-tapping screws
- Drill with bit and countersink
- 1/2″ plywood for rear doors
- Jig Saw
- Carpenter’s putty, spackle, sandpaper, and interior white paint.
- Wallpaper (optional)
We went with tongue and groove panels for a few key reasons.
- It was sturdy and we could mount items directly to it
- Preprimed meant easier painting
- It was easier to cut out openings for windows
We purchased our boards from a local lumber yard though Home Depot but other major hardware stores should have them. Don’t purchase everything at once as it will be difficult to tell how much you need (mistakes are bound to happen!). To conserve on weight and how much wood we needed to purchase, we added the walls after all the benches and cabinets were installed reducing wall space.
To attach each board to the wall, measure the length needed, cut each board with the miter saw or jig (for a curved cut), and dry fit each board. Once satisfied with the length, identify where the beams of the van wall are and predrill each hole with the countersink. Lastly, screw the self-tapping screws into the beams of the van wall. Starting from the top of the benches, we cut each length to size and worked our way up the walls.

")

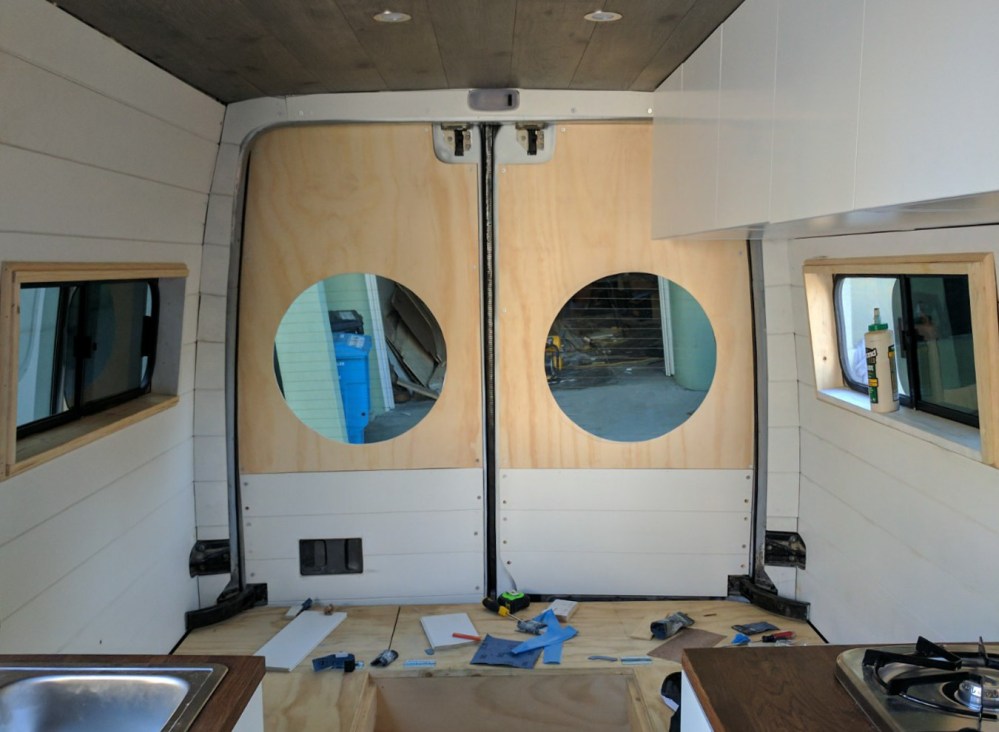
Once we have covered all exposed walls, we then moved on to the back doors. On the backdoors, we only used tongue and groove for the bottom portion. We knew we wanted to reduce the size of the rear windows though still wanted line of sight out the rear windows when driving. For the top half, we used 1/2″ plywood. To do this, we created a template out of cardboard, cut the panels, then we cut large holes in the middle. Using the same method as the tongue and groove panels, we attached them to the doors with self-tapping screws.


The finished look (prior to paint and wallpaper).
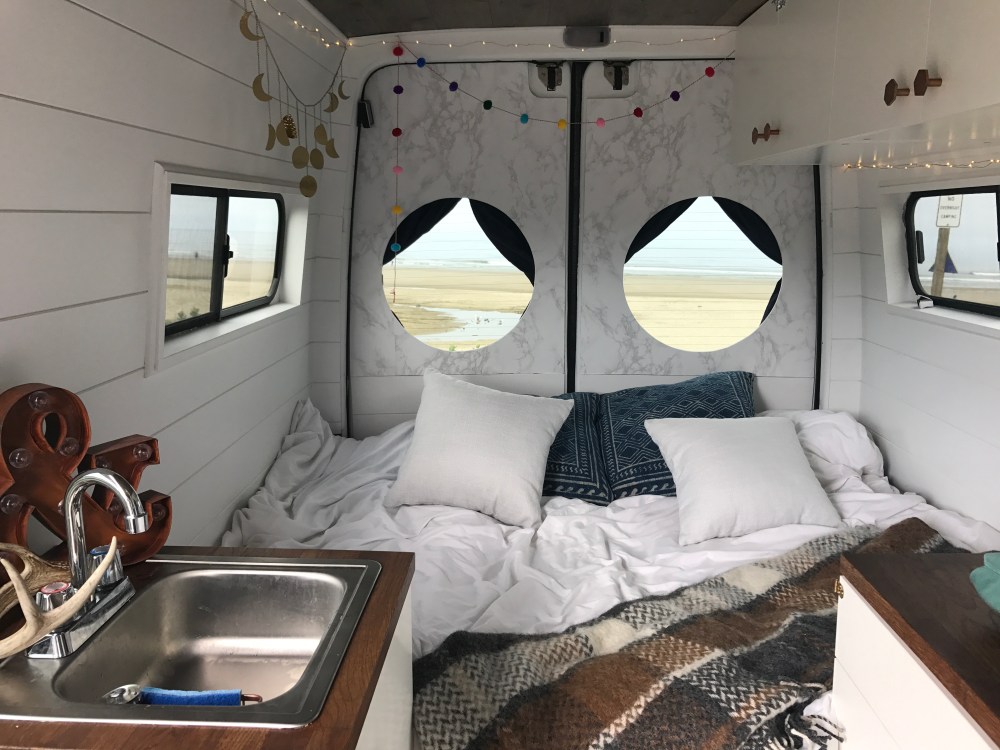
As a final step, we added curtains to the rear windows. This was done by removing the plywood panels, adding curtain rods, curtains, and hooks to the exterior side (between the glass and the panel). We then reattached the panels to the doors. We did a shotty job of this but you’ll want to paint the back of the boards that face the window a dark color such as black. This just leaves a cleaner look from outside.
The final, and arguably most tedious step, was filling all the holes. Some of the holes were quite deep so we used putty first, then spackle, sanded, then painted. This took days to complete so leave yourself ample time! You can see the final result below.
Questions? Feel free to shoot us an email and we’ll happily elaborate!
