
Here are the steps we took in order to complete our build. We’ll add more details for each step in separate posts with more photos and details (and links to products) soon. If you’d like us to add a post or have a specific question, contact us at http://www.instagram.com/viathevan through email or DM.
Disclaimer: These are only our opinions. We are not professionals nor are we licensed in any way to recommend best practices when it comes to converting a van. Social media and the Sprinter Forums have been an incredible help to us and we’d like to pay it forward. Read this to avoid our mistakes or start a to-do list of your own!
Things to note.
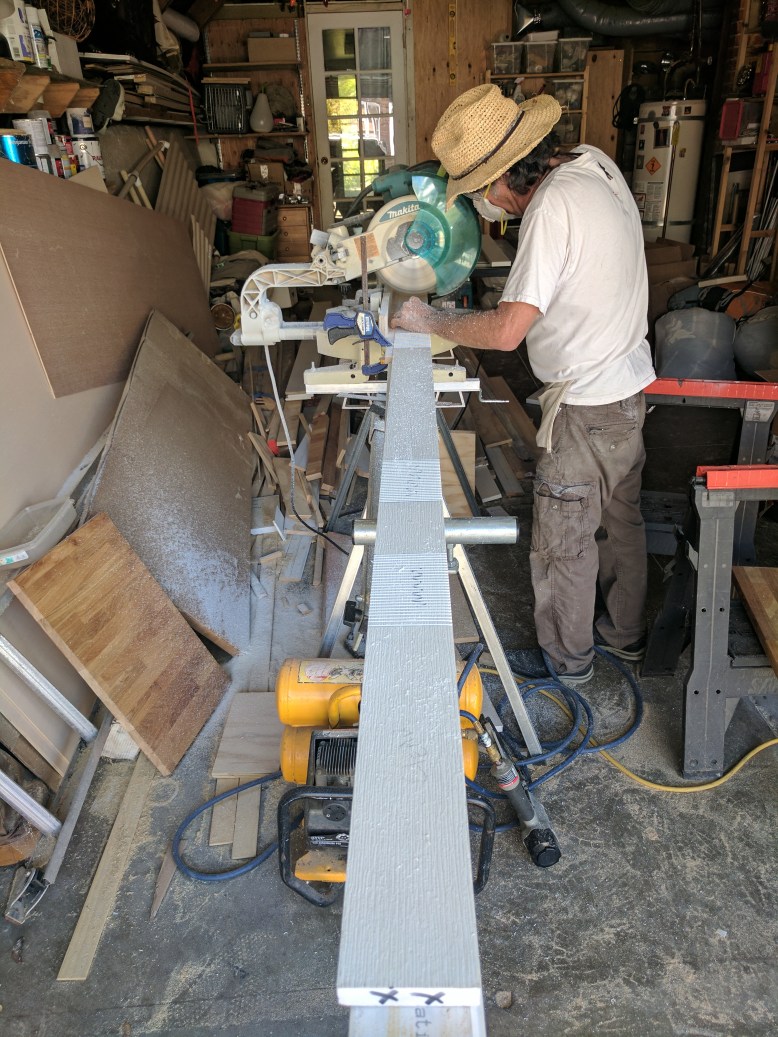
- Willa’s step-dad is the handiest of handy men (worked as cabinet maker/carpenter and was a commercial set designer in LA) and came equipped with a table saw, a compound miter saw, and a few other tools found in a wood shop. Assume that any of the steps involving cutting wood includes these materials though many steps can be done without the use of a shop – just budget more time.
The Process…
Decide you want to live in a closet. Jokes. But really… are you ready?
Choose the size Sprinter you are going to need.
- 144- We chose a high roof 144” because we wanted a vehicle we could stand up in, wouldn’t drive like a truck/ RV and would fit in regular street parking so we could tour cities. For those of you saying, wait, wait, wait, you have a bathroom and Luke, you’re 6’2”. All true. We managed to squeeze in a bathroom (which we’ll go into detail later) and we sleep diagonally.
- 2008 – We went with a 2008 model (NVC3 2007+) because after weeks searching Sprinter forums we read that they handled better than the previous model and are less prone to mechanical issues found in the earlier T1N models.
Buy your van and get it ready for work.
- Clean and repair your van. If it’s used like ours was, spend the money on a good mechanic and take a chunk of time getting it as clean as possible- once your home is inside, this will be much more difficult.
- Important Note: For those of you nervous about buying from a private party, one option you can do is to call a mobile mechanic/ auto inspector and they’ll come out to check out the van before buying. You must get the sellers permission of course and it isn’t always cheap but it may help you sleep at night. Also, if your budget is tight, you’ll likely need to cut a corner or two to get yourself on the road by buying a van that needs some work. This is the route we took and we’ve driven across the U.S. already (though our van has spent some time in the shop getting repaired).
Strip it bare.
- Remove the floor, sub-floor, and any wall paneling that may have already been installed.
- Pro Tip – Save the floor – it will be a great template for when you cut your new floor.
Remove any rust and paint.
- Rust won’t go away unless its fully removed (with wire brush, angle grinder, rust dissolver, or other tool) and then sealed over with paint.
- Take time to do this properly – work slowly to ensure you get to all the rust.
Add sound deadening material.
- We added it to the wheel wells, lower portion of the walls, all rear doors, and under the cab floor.
- Materials: Noico sound deadening mats from Amazon (purchased this due to price – you could buy Dynamat or Rattletrap if your budge allowed for it)
Insulate and build sub-floor.
- We first filled any bolt holes from the previous floor, then made a frame of 2x2s, insulated it with rigid foam board, and then topped with plywood.
- Materials: Reflectix, 2×2’s, rigid foam insulation from Home Depot, 1/2” plywood
Cut and install windows.
- This might seem scary but after cutting the first one it wasn’t too bad. These vans have pre-cut out templates that can be used for factory window installations. Remember for any non-factory windows you’ll add, measure twice, cut once (actually measure 6 times to be safe).
- Materials: Sprinter and RV windows, 1 van porthole window, jigsaw with metal cutting blade, primer paint, 3M window weld for factory Sprinter windows, butyl tape and rivet gun for RV windows.
Install the ceiling fan.
- Cut a hole in the roof, build a frame for the inside of the van, and screw the fan down into the frame through the roof. Once installed, seal the fan.
- Materials: MaxxFan 4500, jigsaw with metal cutting blade, butyl tape, 2x2s for window frame screws attach to, Dicor self-leveling lap sealant (this is specific for RV installations)
- Side Note: We did not do this prior to insulation though we recommend doing so. Cutting holes prior to insulating the van is much easier.
Insulate the walls
- There are many ways to do this. We went with a combination of Reflectix and rigid foam board insulation from Home Deport for larger flat panels. We then used UltraTouch denim insulation for all the smaller compartments. To fill any gaps, we used spray foam insulation and covered with foil tape.
- Materials: Ultra touch denim insulation from Lowes, vapor barrier (ours was a plastic painter’s drop cloth cut to size), foil tape to attach barrier to walls, rigid foam board insulation from Home Depot and Reflectix for larger areas, GREAT STUFF crack filler spray foam.
Insulate the ceiling
- The ceiling only required reflectix and foam board. By cutting the panels to the exact size, we could press them in for quite a snug fit and they would stay in place without tape or adhesive.
- Materials: rigid foam board insulation from Home Depot , foil tape, Reflectix
Install headliner shelf
- We took a basic approach to our headliner shelf using 2x2s for support, long screws, and plywood for the shelf itself.
- Materials: 3/4″ plywood, 2x2s, 3″ construction screws, drill.
Install solar panels
- Like many others, we weren’t interested in drilling more holes in the roof and didn’t want to spring for rather pricey adhesive mounts. Instead, we purchased L shaped angle bar with pre-cut holes and the necessary hardware to install these to our factory roof rails.
- Materials: Renegy 300 watt RV solar kit, metal track for custom-made mount, hardware to attach rack to Sprinter factory roof rails, 1” hole cutter and drill to run wires into the van.
Run fan wiring
- Be sure you know where your battery bank will be as once you add a ceiling, changing wiring can be a bit of a pain.
- Materials: 12 gauge speaker wire, wire crimper, wire connectors, heat shrink
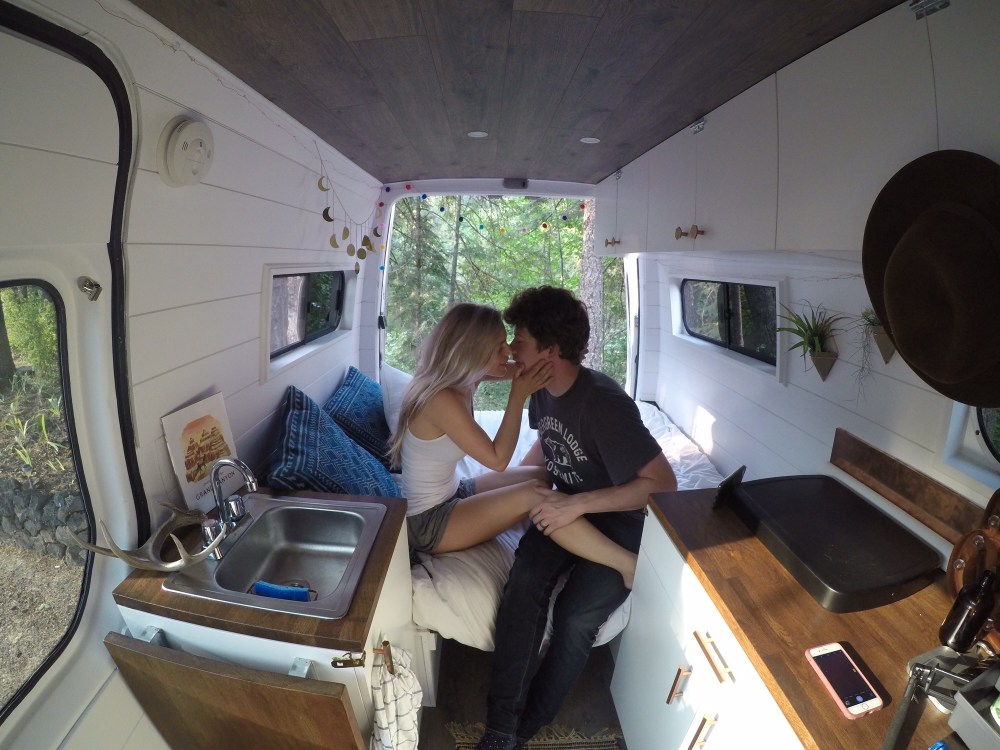
Install ceiling panels
- We used tongue and groove panels for ease and they looked great. To attach them, we screwed wooden slats to the ceiling beams and then nailed the floor panels to slats.
- Materials: Pergo tongue and groove flooring from Lowes, wooden slatss, nail gun and nails, 1” and 1 ¼” self-tapping screws
Build benches
- Our benches didn’t use a frame (of 2x2s or 2x4s) like many others we’ve seen built. Rather, we used plywood, wood glue, and finish screws to build them (like a cabinet would be built).
- Materials: ¾” plywood, 2” and 1 ¼” finish screws, wood glue, hinges (small generic), optional ¾” trim, 1×3 of pine to support table inside the cavity when converted to a bed, generic hinges for lids.
- Optional: build wheel well boxes if you want a flat surface inside the box for storing items.
Build window frames
- We wanted our windows to look clean and knew we needed to frame them somehow. After trying to bend different materials to match the curvature of the window edge, we went with rectangular boxes.
- Materials: 1×3 pine, wood glue, finish screws, industrial adhesive
Install walls
- We went with wooden panels/slats that were tongue and groove. The panels were thicker than sheets of flexible plywood so we could mount items directly to them.
- Materials: Preprimed white tongue and groove panels, 1 ¼” self-tapping screws, countersink.
Assemble and install sink and stove cabinets
- We did this without countertops at first so we could wire our electronics that would be part of the cabinets. IKEA cabinets were easy and required no motifications.
- Materials: IKEA pre-made cabinets and doors
Build refrigerator box
- Our 12V fridge was intended to be screwed into a box (with walls on the sides and top). We built a box in our stove cabinet made of 3/4″ plywood though left the back open to vent the compressor.
- Materials: 3/4″ plywood, finish screws, wood glue, 2″ wood screws (for attaching the fridge to the box).
Install overhead cabinets
- Unlike floor cabinets, these cabinets needed to be customized. We created a template with a cleat and then modified our cabinets. The overhead cabinets hang on this cleat for support.
- Materials: IKEA overhead cabinets, 1×4 pine, wood glue, self tapping screws.
Install battery bank and connect solar
- Wiring our batteries together, running wires, and adding fuses made us nervous though YouTube was a massive help. We have sealed lead acid batteries that require little maintenance and we mounted them in a compartment near the rear of our van.
- Materials: Casil 100 Ah, sealed lead acid batteries (from Amazon), fuse box, 500w pure sine wave inverter, 40 amp marine breaker switch, master power switch, assorted wires and connectors, crimping tool.
Install electrical
- Outlets, light switch, 12V water pump, lights, fridge and fan. We have a basic setup using a marine fuse switch box and speaker wire. Most of our electronics came with the fuse sizes they recommended.
- Materials: 12 gauge speaker wire, wire crimper, wire connectors, heat shrink
Install counter tops, sink, and stove
- We installed IKEA butcher block on top of our sink and stove cabinets. On the side of the sink cabinet, we added a folding counter/shelf for additional counter space when cooking. Our sink and stove were drop-ins that only required a few screws and sealant.
- Materials: butcher block, Flame King drop-in two-burner stove, sink, silicon caulk.
Install plumbing for sink
- Similar to most things, we used inexpensive simple materials for our sink and water tanks. We have a 7 gallon fresh water tank we purchased at REI (BPA free) and a 3 gallon grey water tank our sink drains to (which we are thinking of changing). We used a combination of plastic and brass fittings to connect the hoses.
- Materials: 3/4″ ID (inner diameter)rubber hose, 1″ ID rubber hose, hose clamps, plumbing barbs and fittings, 7 gallon and 3 gallon tank from REI.
Install Propane for stove
- Our propane tank is located under the stove in the cabinet (near the sink, though well vented). We mounted it using a number of bungee cables and placed it on a rubberized mat.
- Materials: 11lb propane tank, bungees, regulator, fuel gauge, fuel tape, and feul hose.
Cut panels and circles for back doors
- For the lower half of our rear doors, we used the same material as our wall (tongue and groove panels). For the upper portion, we used 3/8″ plywood and cut large holes in them to still see out the back windows. We then added curtains between the panels and windows.
- Materials: 3/8” ply jigsaw, 1 ¼” self –tapping screws, curtain fabric, curtain rod, 1/2″ wood screws.
Install bathroom/shower
- This was one of the more challenging aspects of the build and we left it for last. We built walls out of a combination of different ply, added plastic wall panels and sealant on top for waterproofing, and then had a custom shower pan made by a local metal shop.
- Materials: 3/4″ ply wood, 1/4″ plywood, plastic wall panels, plastic panel adhesive, trowel, jig saw, plastic (PVC) 1x3s, pre-made door from Lowes, 1/14″ shower drain, silicone sealant, custom made shower pan, and Thetford Porta Pottie.
Install Floor
- A quick finishing portion of the build. Cut each tongue and groove floor panel to size and then trim.
- Materials: PERGO tongue and groove floor (same as one the ceiling), nail gun, 3/4″ corner trim, stain for trim.
Install Table
- Our table is made from the same butcher block as our counter tops. We used a marine table base and marine pole to build the table. Our table is smaller than the negative space between our benches so we can get in and out of the benches.
- Materials: IKEA Butcher block, marine table bases and pole from Amazon.
Fill and Spackle
- The devil is in the details. We filled and spackled all of the holes we had made for a clean finish before painting.
- Materials: Wood filler for larger holes and spackle for everything.
Paint:
- One coat of primer and one coat of interior white paint one every exposed wooden surface. We knew we’d add color and decor with our fabrics and items attached the wall, plus we wanted a well-lit space.
- Materials: Frogtape, 2 large cans of primer, 2 large cans of white interior paint, assorted brushes, rollers and drop cloth.
Add hardware
- We added knobs for all overhead cabinet doors, handles for all floor cabinet doors, a low profile doorknob, magnets, and latches to every door to prevent them from swinging.
- Materials: hardware of your choosing. Local hardware stores have plenty of latches!
That’s it! Check back for more detailed posts on each of the above!

Thank you so much for providing this information! I’m currently converting our Promaster and this is an excellent outline to go by.
LikeLike